Frequently Asked Questions
SHIPPING & RETURNS
Shipping methods and times:
All packages are shipped from our hands to yours from our studio here in lovely Pocatello, Idaho, USA.
All packages typically ship within 1-3 business days through USPS first class mail.
Free shipping and Standard First Class packages typically take 5-7 business days to arrive in your hot little hands, but may be subject to seasonal or other delays from our lovely post office people.
This means that your package will arrive in a happy white bubble envelope in your regular mail box. 😊
Advent Boxes
Advent Boxes will begin shipping out the first week of November using UPS Ground shipping unless otherwise requested.
We want to make sure your box makes it safely into your hands, so if you need it delivered earlier or later, CLICKY HERE to contact us and let us know!
Incorrect Orders
We pack each order with love, but we are only human and sometimes make mistakes.
If there was a problem with your order, please rest assured that we will make it right!
Just CLICKY HERE to tell us what went wrong so we can get fixed up for you right away!
Returns & Exchanges
We understand that sometimes you just don’t love things as much as you thought you would and are happy to accept returns or exchanges of merchandise within 30 days of your purchase, providing that your item is in its original, resalable condition.
If more than 30 days have passed since your purchase, or the item has been damaged for any reason OTHER than due to our error, we’re very sorry, but we can’t accept the return.
Please CLICKY HERE and send us a message that you would like to return your item BEFORE shipping it off to us so that we can watch for it’s safe return. Once it makes it’s way back to us we will be happy to send your exchange item, or issue a refund.
Please return your return or exchange items at your expense to our studio:
Twice Sheared Sheep
315 S 5th Ave, Suite A
Pocatello, ID 83201
PRODUCT WARRANTIES
Each of our tools are hand made to last for years and years of happy knitting and breakage is not common.
But if something does go wrong with your new tool, rest assured that we offer a lifetime warranty on all of our Twice Sheared Sheep products.
Please send a photo to our lovely customer service team at Support@twiceshearedsheep.com of your damaged item and we’ll be happy to send a replacement free of charge.
PRODUCT QUESTIONS
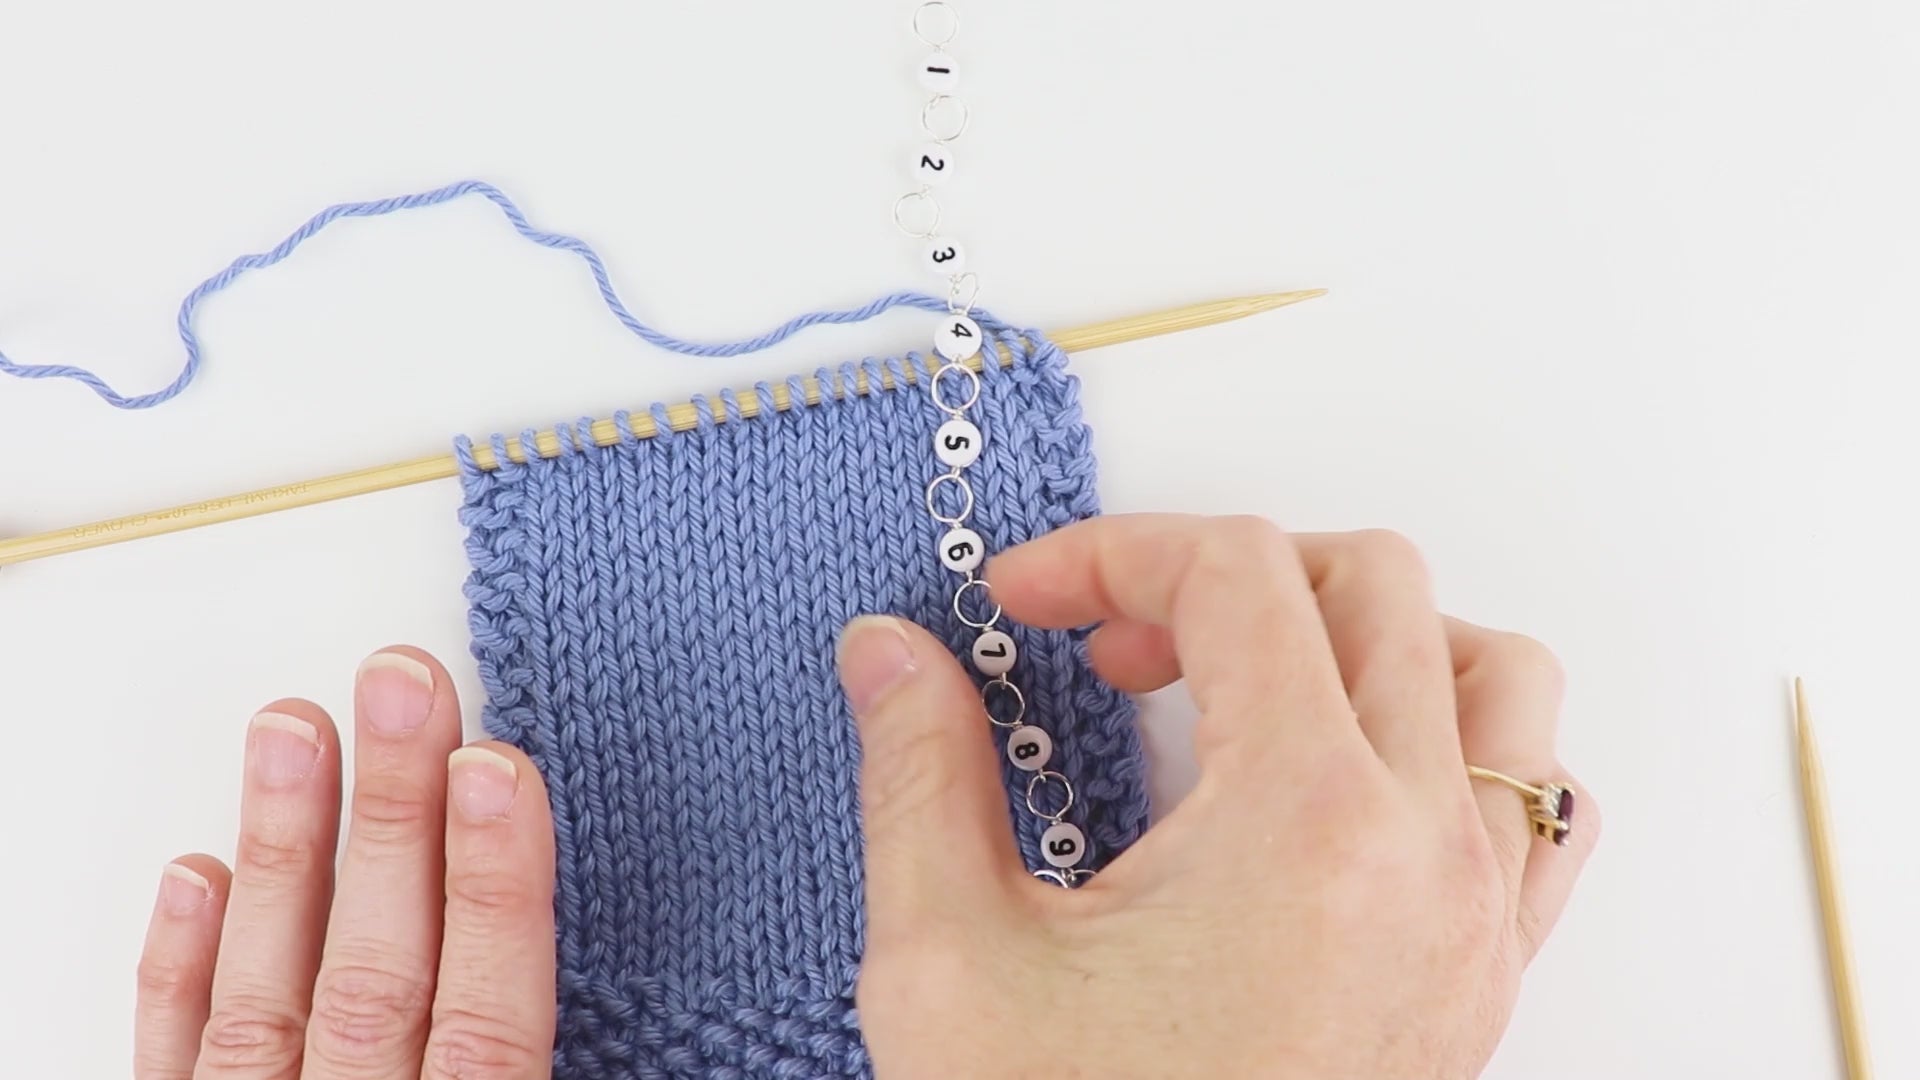
How do you use a row counter?
The row counter is essentially a fancy stitch marker, so you can use it anywhere that you would normally use a stitch marker.
Just slip it onto your needles between 2 stitches and knit as normal.
When you have knit your way back to the counter and you need to slip it from needle to needle, just move the counter to the next number in the chain.
Easy peasy!
If you’d like a visual here’s a video to show you how it all works:
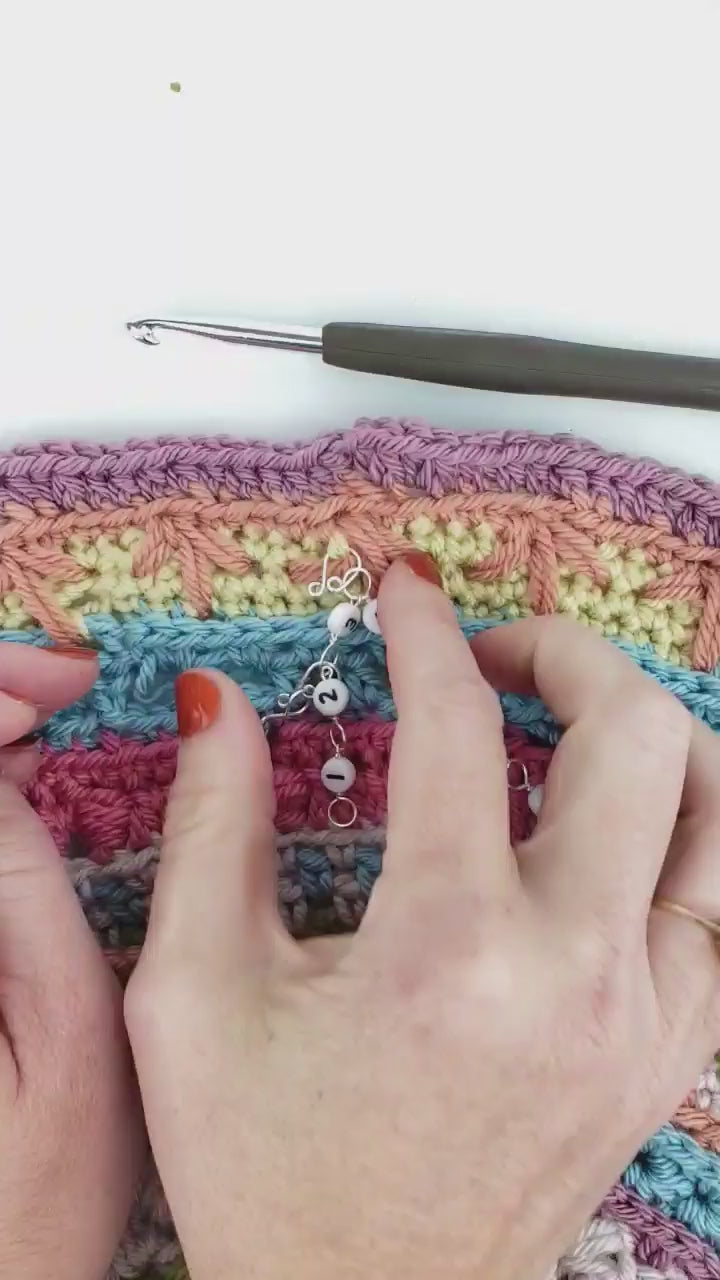
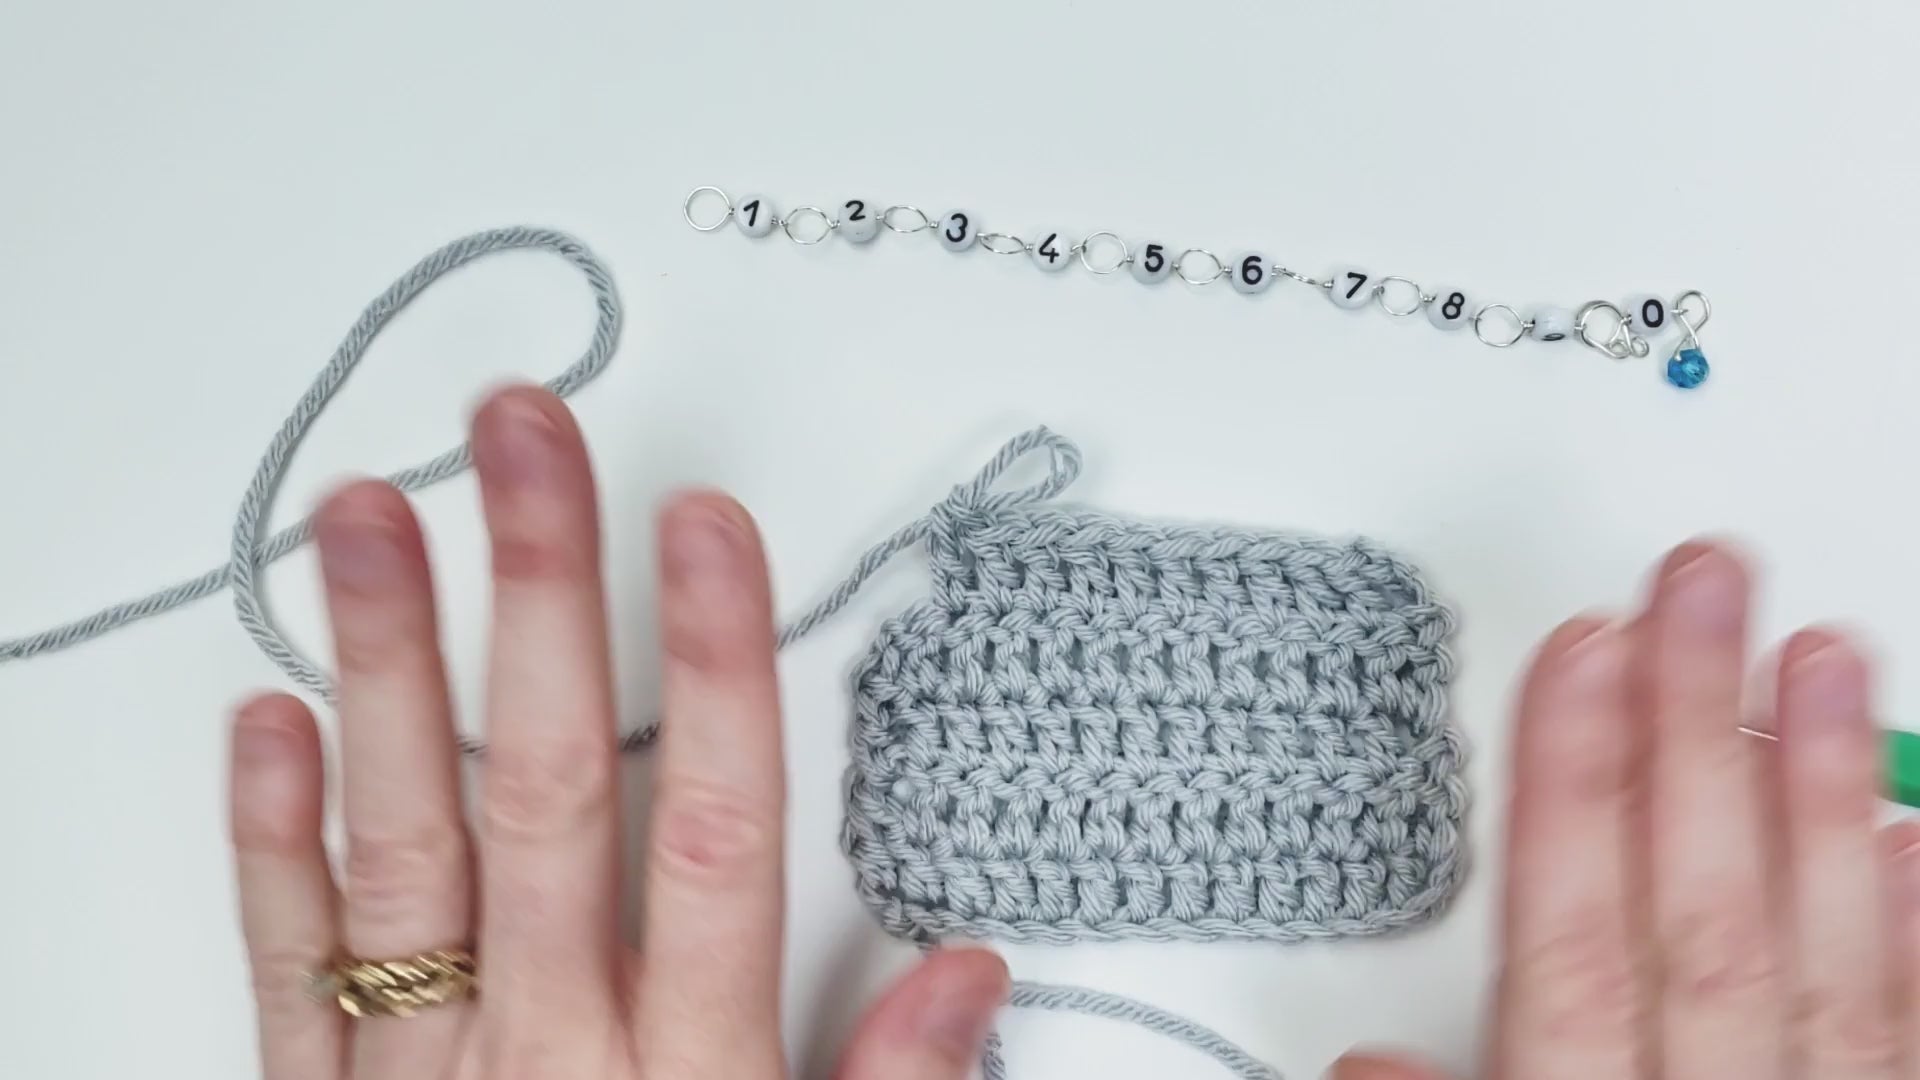
Can I use a row counter for crochet?
YES!
You can either use the attached melody clip to “pin” your row counter to the edge of your work using the attached melody clip (or other locking stitch markers).
Or you can slip it onto your hook and carry it along with you as you go! Here’s a little video to show you how to use your counter for crochet:
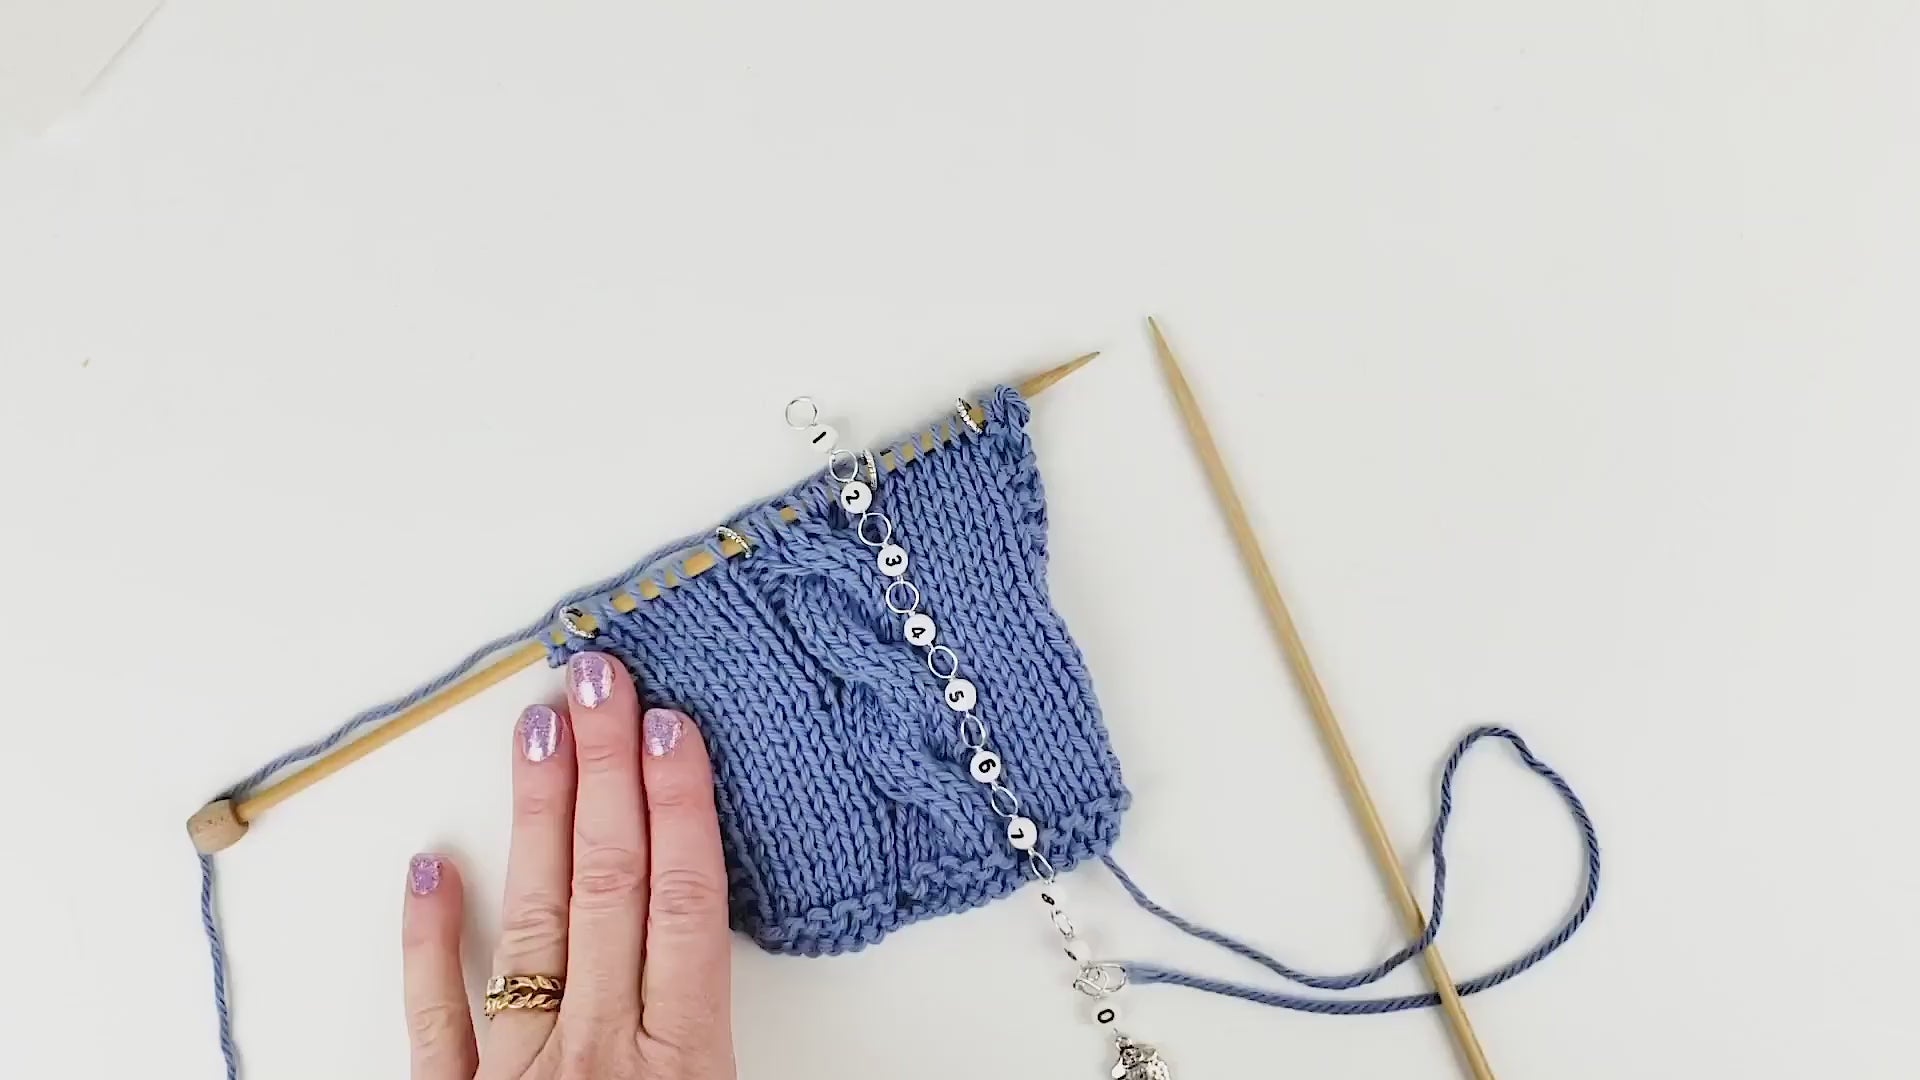
How do you use a row counter for flat knitting?
The row counter is essentially a fancy stitch marker, so you can use it anywhere that you would normally use a stitch marker. It will need to be placed between 2 stitches or it will slide off the needles.
When knitting flat, I usually place my counter 2 stitches into the work on the right side, after the edging, or just before whatever element that needs counting.
This means that on the right side, you will move the counter near the beginning of the row, but won’t move it again until almost the end of the wrong side rows.
If this bothers you, you might prefer one of our Odd / Even row counters instead!
You can read about them below.
How to use an Odd / Even Row Counter?
Our Odd / Even row counters are a single row counter essentially broken in half.
So that you can have 1 row counter at each end of your work when knitting flat and can thus move a counter at the beginning (or end) of each row to keep your brain on track.
To use:
1) On a right side row, place the odd counter on the needles just after the starting edge stitches, and the even counter just before the end edge stitches.
2) Each time you come to the counter at the beginning of your row, move it to the next number in the chain. Slip the counter at the end of your row from one needle to the other on the same number loop. Your row count is the highest number loop on the needles.
3) Clip the Melody Clip on number loops to mark the “10’s” place in counts over 10, or to keep track of pattern repeats
Here’s a visual to show you how:
Help! Why does my row counter keep falling off my needles?
Our chain row counters are essentially a fancy stitch marker, so like any other stitch marker. So unlike those little barrel row counters you may have used in the past that sat on the end of the needle, your chain row counter needs to sit on your needles between 2 stitches or they’re just going to slide right off. When knitting in the round, I like to place my counter between the 1st and last stitches so that it marks the beginning of the round. When knitting flat, I usually place my counter a couple of stitches in on the right side row, after the edging, or just before the element in my pattern that needs counting (such as a cable or lace panel). This keeps the counter nice and secure so that it always stays with your knitting. It also means that you physically HAVE to move the counter from needle to needle when you come to it and can’t forget to move it to the next number like may happen with all your other row counters!
Does the chain row counter get stuck or ‘knitted in’ to your work?
NOPE! The chain counter is just a fancy stitch marker, so it doesn’t get knitted in to your work any more than your little loops will. Here are some tips to ensure that your chain counter is the most enjoyable to work with, however:
- Knit with both halves of the chain hanging on the same side of the work to ensure that your working yarn doesn’t go ‘over’ the top of your chain and accidentally trap it.
- When slipping the counter from needle to needle, make sure the counter is hanging down on the opposite side of the work from your working yarn. This will also prevent the yarn from passing over the top of the chain.
- Depending on your personal knitting style and how much your right needle moves while knitting, the chain can swing about a bit in the first few rows of knitting. Once it has a length of finished knitting to lay against, this will no longer be noticeable.
- Like any other solid ring stitch marker, be cautious when using lifelines. Don’t run the lifeline thread through the loop of the chain or it will become attached to the lifeline.
What size row counter or stitch markers should I get?
We offer 4 different size options for all of our counters and stitch markers so that you will always find a size that fits your current project and needles like a glove.
We find that we get the most enjoyable knitting experience when we use a counter that is closer in size to our needles, but you can absolutely pick a more “one size fit’s all” counter for your knitting projects and use it on any needle that fits within the range.
The general rule is that you can always use a smaller sized needle on a larger counter… But you can’t use a larger sized needle on a smaller counter!
If you are unsure what size to get, we find that size MEDIUM is by far the most popular and covers most needle sizes from worsted weight on down.
Small
- Fits Knitting Needles up to US 4 (3.5 mm)
- Fits Crochet Hooks up to E (3.5 mm)
Medium
- Fits Knitting Needles up to US 8 (5 mm)
- Fits Crochet Hooks up to H (5 mm)
Large
- Fits Knitting Needles up to US 10.5 (6.5mm)
- Fits Crochet Hooks up to K (6.5 mm)
XL
- Fits Knitting Needles up to US 15 (10 mm)
- Fits Crochet Hooks up to N (10 mm)
What is the difference between “Melody Ring” and “Infinity Ring” stitch markers?
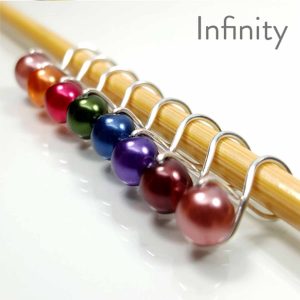
Infinity Ring – Hands down, my absolute favorite stitch markers on the planet. Due to their unique shape, these little beauties are the perfect stitch markers for everyday knitting.
- The unique tear drop shape gives just a little bit more wiggle room than traditional round loops and lets each marker glide from needle to needle like butter (Seriously, you won’t believe how lovely that is).
- All ends are safely tucked into the decorative bead so there is absolutely nothing to snag on even your most delicate fine yarns.
- The little bead hugs close to your needles, making them just substantial enough to feel easily as you knit (so you don’t just blow past it) but unobtrusive enough that there is nothing to tangle in your yarn or your stitches.
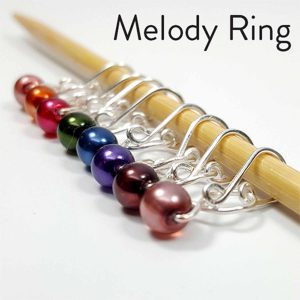
Melody Ring – Our Knit Club favorite, and the perfect stitch markers for knitting and crochet alike!
- Hand made removable ‘clip’ type loop for the ultimate in versatility. Use it as a stitch marker on your needles, clipped to your work for crochet, clipped to individual stitches in your knitting to mark rows or pattern elements, or even use it as an extra clip on your row counter. These markers can do it all.
- Safe for lifelines – Accidentally ran your lifeline through your stitch markers? No problem, just ‘pop’ the lifeline out of the clip and you’re good to go.
- Just enough dangle bling. I know we crave a little bit of dangle bling. Who doesn’t?! These little markers give you just enough dangle, without getting in your way.
- Snag free as always. Each marker is hand made for you with all sharp edges filed and wire ends tucked securely into beads for a glorious, smooth, snag free finish.
How to use our Knit Increase / Decrease counters:
These tiny little counters are great for patterns that require you to increase (or decrease) ever other row, such as sock toes!
They’re also great for 2 row pattern repeats.
1) Place your row counter on the needles between 2 stitches as with any other stitch marker
For crochet pin to your work, or slide the loop on your hook before the working loop
2) Each time you come to the counter, move it to the next loop in the chain
3) Use the K for normal rows (knit, purl, or crochet) and I for increase rows, D for decrease
About Us
Who is Twice Sheared Sheep LLC?
Hey there! So nice to meet you.
The Twice Sheared Sheep is a small knitting tools company based in Pocatello, Idaho and it’s our mission to make beautiful and useful brain saving tools so you can stress less and KNIT MORE!
Your happiness really IS our purpose.
Each of our row counters and stitch markers are hand made here in house by our team of assistants to your specifications.
Pick your size
Pick your style
Pick your color
We want your tools to fit your project like a glove.
Because we’re knitters too, we understand how much of an impact the little things make – smooth joins, shiny beads, happy colors, and tools that are not only functional but beautiful too!
We want you to smile and get that little flutter of joy in your heart every time you pick up your project.
Where are you located?
While we do not have a retail shop open to the public, our production and shipping all take place at our Pocatello studio at:
1070 Hiline Rd
Suite 315
Pocatello, Idaho 83201
You say handmade, but who ACTUALLY makes my pretty things?
We are proud of the fact that every row counter and stitch marker in our shop is made, assembled, and packaged locally by our team.
That means that there is a real person that has lovingly made your tools, packed them carefully, and sent them in happy white packages to your door.
It also means that for every tool you enjoy, you are helping support all of our families – ensuring that mamas can work from home with their babies, and build our own US economy.
Our Team

Dawn - Owner

Katie - Social Media Coordinator

Shauna S - Production

Shaunna V - Production
Kourtnee - Production

Jana - Production

Coco - Production
Wholesale
How do I apply to be a wholesale partner?
We love our local yarn shops! If you’d like to see Twice Sheared Sheep products in your shop, CLICKY HERE to fill out a wholesale application and we’ll get you all set up.
What are your wholesale terms?
We love wholesale orders!
We offer a 50% discount for our wholesale customers.
We have a $400 piece minimum order ($200 after discount) from anything on our wholesale orderform HERE.
Payment is due at the time of the order, and turnaround is currently 2 weeks or less from order to delivery. If that sounds amenable to you, CLICKY HERE to fill out a wholesale application and we can get started.